Arkiv för kategori: Graphics

GGC has passed and everything went well. We didn’t win anything but we got some great feedback, people really liked the graphics and the music. We also now know how we can improve our game from all the other feedback we got, we will do this in the future.


This is my last entry for this production as GGC has passed and the production is at a hold.

This has been one of the most hectic weeks of our production, as we thought the Beta was earlier than it actually was. Some of us sat up all night trying to finishing up some of the ”last” touches of our levels. It was not pleasant to hear that we had worked those insane hours almost for nothing. After that we who had worked so late took a brake the rest of the weekend. Even though I thought to myself that I could use the break, I still worked a little bit.


I have worked so much that I have run out of things to do at this point. Some of the things we had planned on doing from the beginning, example wise the main character and the animations, they had to be cut from this production due to that we are short on time. Even that I don’t really have anything to do because I can not still do the things that were cut from the production as there is too little time… Where did the last weeks of production time go? I thought that we had 10 weeks, not 8… But everything has to be wrapped up in for Gotland Game Awards which takes place on Gotland the 28/5/2014.


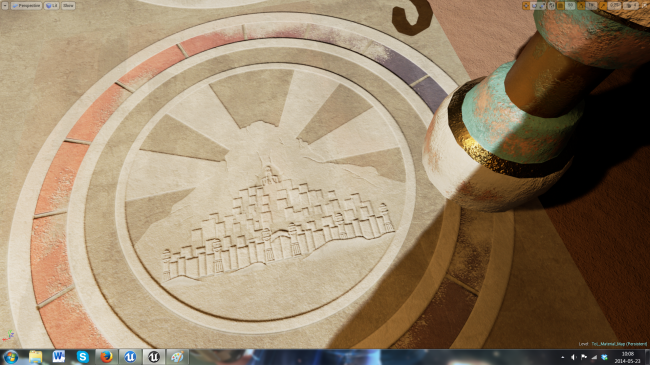
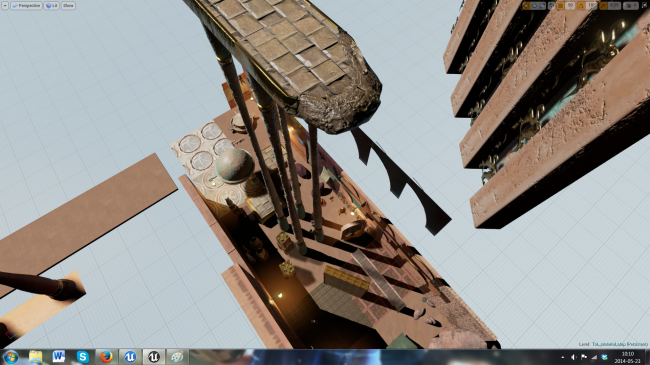
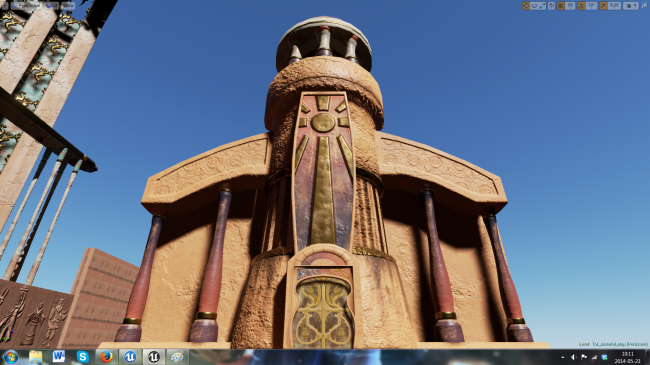
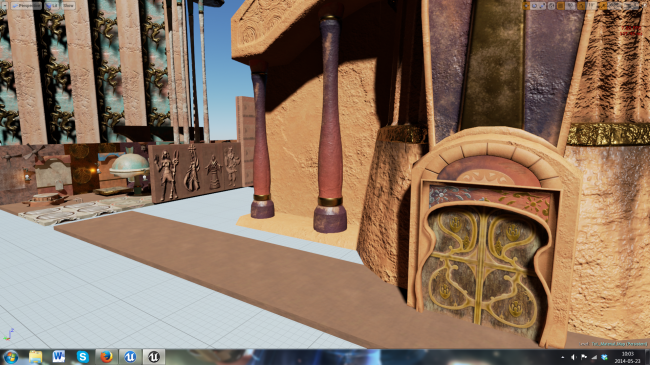
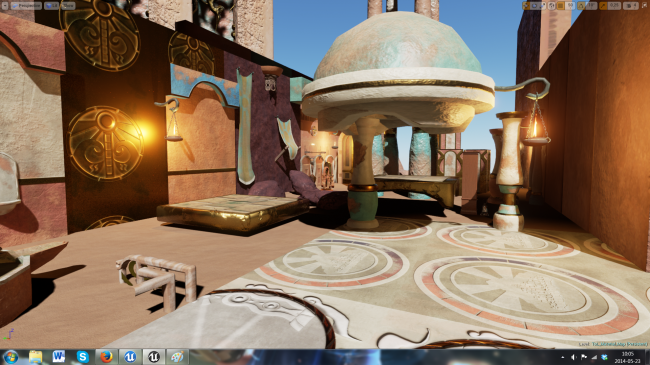
Here are screen shots of some of the things that I have done.

ImageImageImageImageImage

(This is a little bit of late post. But better late then never.)

I made many textures for the wind level this week, we wanted to finalize a particular level so we could show our game to our Tutor. It was hectic to make so many textures in such a short time, but I did manage to create them with some easy methods. I reused some textures I had already created but I gave them some variation from one object to the next. I did this for the Color and Normal maps. I had already saved some Normal maps from before where I had some Random Cavities in them or a stone texture and etc. Same for the Color maps as many objects had the same materials, such as stone, gold wood or even painted stone, mainly painted stone. Even though I did much I did not get everything done, but it was enough to show how the level is going to look and the rest of the game. Some 3D models got a more simple texture for the moment, they will be replaced in due time. Another method for getting things done fast was to divide 3D models into the different materials, that way we already had a Material ready to simply be applied to the 3D models, this made the production faster and easier for me. Here is one of the Screen shots we took.

Image


Later during the weekend we recorded some where I did the voice acting for our trailer and our cut scenes. It was very interesting at least as we recorded in a bathroom, we decided that was the ideal spot at the time, because we couldn’t access any better location at the time. There was just too much echo and noise in all other rooms. After three hours we had something we all were  pleased with.

This week it feels like I had worked even more than usual, I don’t know how but it just feels like so. I usually work the whole day and I don’t really do anything else than work, but somehow I felt that I had to work even more which is interesting. None the less I did manage to complete the things I had to do. Why it was so hectic was because of the Alpha stage of the production was nearing, it took place on the Friday. We did get some interesting feedback, much of the feedback we got was something we already knew, but it could be expected that it would get pointed out. It is good that we got that feedback because then we get some confirmation of that those things we have thought of adding are important. Why we have not added them in yet is because of time, those things will be our priority of now. one of the things they mentioned were that the couldn’t tell what was important and not in a level. Among those things was the mirrors they were not easy to see but that has to do a bit with the lighting because it was very dark in some places. Still the mirror can easily blend in which is not a good thing, you must be able to tell what is something of importance and not. I got instructed to try out and make the important objects more clear while making everything else a bit dull in their color. The image below shows what I did to solve that problem.

Image

I know that it still looks quite dark, but that will have to be corrected in the actual levels with the lighting, this image is from my own scene where I display everything I work with to see how my textures look. If you can not tell which objects are more important it is the ones that are in the middle, they have more strong colors while most of everything else looks a bit dull. So to make the object more clear the only thing missing is better lighting in the levels. I did this with just changing the color maps, I took away some of the darkest values and some of the lightest values in every color map except for the important objects. That makes them pop out more and the player will notice them easier but hopefully it will be subtle.

Image

Here is a screen-shot of a few entities I have created so far. I have come to a point where I can safely tell more in depth of my work as I am more secure about how I do things and I feel that I have enough quality in everything. I’ll tell a bit about my work process and more in depth of how Unreal Engine works and other programs that I use.


Photoshop

I Mainly use Photoshop as a tool to create all the 2D graphics for our game Temple of Light, I occasionally create concept art for our 3D artists so that they have something to follow. But this week I have mainly created more materials for meshes and more tile-able textures. My work process is quite simple, First I consult with my superior to see if there is anything in particular he wants in a material. After I have gotten some direction I start to make the details. I usually start with the color of the mesh or material, mainly I keep it simple to see if everything aligns on the mesh in Unreal Engine 4, if it does I know for sure that I can continue. After that I continue with making the Normal map, I usually use Crazybump to make my Normals. At this point I start with making a gray scaled drawing in Photoshop, the whites makes the high points for the Normal while the darker ones makes cavities in it. This understanding makes it easy to paint in Photoshop to make a Normal later on in Crazybump. The image below shows a complete example of how my height planning looks before it has been brought into Crazybump.

Image

CrazyBump

From Crazybump I can get a normal out of my Height map which I created in Photoshop. The Normal map is the main file I usually get from Crazybump, I rarely collect other maps such as Diffuse, Specular, Occlusion or Displacement maps. There is rarely a use for them for me as we don’t need them, but I do take them if I get an idea of how I can use a particular map, example-wise I might use any map from Crazybump to improve my diffuse map to get out more details. I tend to go back to Crazybump several times over to create different details on my Normal map. You can combine several Normals in Photoshop by using overlay in layers. You can see on the picture underneath what Crazybump looks like.

Image

Unreal Engine 4

As you may see Unreal Engine 4 takes care of lighting very well, as on this picture I have only applied a Metallic, Roughness and a Normal map. Under all of them is a very plain and simple diffuse map.

Image

See picture below for comparison.

Image

This Image is in unlit mode, which means no details at all is shown. It turns off Normals, Roughness and Metallics, it only shows the Diffuse map.

Normals is not anything new, while on the other hand Roughness and Metallics are. Unreal Engine 4 have replaced Specular maps with these two instead, Unreal Engine 4 can still handle Specular maps but these maps work in a better way, they reflect and bounce lighting from other materials and meshes while a Specular map only makes out which part should be light and dark.

Roughness and Metallic maps are quite simple in how they work, they are only formed up with a gray-scale. The more white they are the more rough or metallic it will get and the more black it is the less metallic or Rough it will be.

I use Specular maps on rare occasions now as before I didn’t know how to work with metallics or Roughness maps. But with practice I am learning how to make them faster and understand them better. So going from only using a specular map now I have to focus on making two more instead, but it does pay of as the result is much more pleasing. As I said I rarely use specular maps, but I did find a use for them and that is making black holes in materials, now if they might need them just as the firetrap on the first picture of this post.

To wrap this week up Everything seems to go fine, just a little bit hectic with finishing texturing on such a small time with so many details going into everything. But I will manage to cmplete everything that I have to do, I will just have to keep on working day and night.
IMAG0713

Yes, the third week have passed and everything seems to go fine, a little bit less of a productive week since it is like a long weekend because of the easter. I kept on working with the usual stuff and everything seems to check out.


Though I stayed and worked a bit more during the easter and I created a character build with a CAT rig in 3ds Max with and a simple base mesh with it. I exported it to Motionbuilder and tried out some simple animations which was ok.  when I imported it to Unreal engine 4 it for some reason didn’t have the mesh linked to the skeleton and when you bring it out in a scene the characters body parts flies all over the place. I will have to consult with someone to help me with this as it is a serious problem. I did this to see if we can use this pipeline method.


Me and Joakim then started to instead working with sounds as the animations will have to be at a hold for now. we started to plan for what we would need, test recording and test to create some sounds. Everything went great, there are just a few question marks on some sounds of how we are going to go about and create those sounds, but eventually we will probably be able to achieve some interesting sounds.

The project goes on but not without problems or complications but it gets solved one way or another. The learning process is slow, and so is the production for the graphics, hopefully though it will pay off in the end.


We have play tested our game, and we have a working prototype. Now we only have to aim for to complete everything that is supposed to be ready for the Alpha.


I have created more materials, learned how to refine them and tile them correctly in Unreal Engine 4. I have also started to create a a bunch of concepts that the 3D artists will use as a guide towards creating the meshes. I will later on make the textures for them when the meshes are done and I don’t have anything much more urgent to complete, such as more concepts.

ImageThis is my first entry, these following weeks I will do my work and then reflect upon it. I will also include in this first entry of what our game is about.

Our game is a puzzle game which is based on mirrors reflecting light from a source to a destination. It all takes place in a temple which is in the desert.


I had a slow start, I had to wait for about two days before I could start working, this happened mainly because we didn’t have any real concept or anything of a real guideline for that matter either. I couldn’t just start creating textures when I don’t know what it should look like.


Anyway, when I did get the chance to start working I kept on working so much that I almost forgot about the time. Most days i stayed until it was 11:00 pm. I even forgot how much time I actually really spent on each asset. So I found it difficult to figure out how I was going to note down the correct amount of time on the Scrum. I will try to address this by keeping an eye out on the clock a bit more.


The things I create are Materials in Unreal Engine 4. By creating them I must learn how to create the Materials we want, the process goes like this: First I create textures in Photoshop CS6, then I import them into Unreal Engine 4, create the materials with those textures. Some Materials can be made straight from within Unreal Engine 4, but for me to be able to do that I will have to learn it. Later on we will use these materials to sort of like paint the levels, we will be able to simply drag and drop the materials to surfaces and then even blend Materials over each other. This is also something I will have to learn as I am quite new at this.